안녕하세요 이번 시간에는 5강 네트워킹의 다섯번째 강의인 '웹으로 요청하기' 리뷰입니다.
마찬가지로 개념을 알아보면서 실습한 내용을 덧붙여 알아보도록 하겠습니다!
보통 웹 서버로부터 응답을 받으면 응답 데이터의 포맷은 JSON인 경우가 많습니다.
JSON은 자바스크립트 객체 포맷의 데이터를 주고 받을 때 사용할 수 있도록 만든 것으로, 자바스크립트 객체 포맷과 매우 유사합니다.
영화진흥위원회에서 제공하는 샘플 주소(http://www.kobis.or.kr/kobisopenapi/webservice/rest/boxoffice/searchDailyBoxOfficeList.json?key=430156241533f1d058c603178cc3ca0e&targetDt=20120101)에서 JSON 데이터를 요청해보도록 하겠습니다.
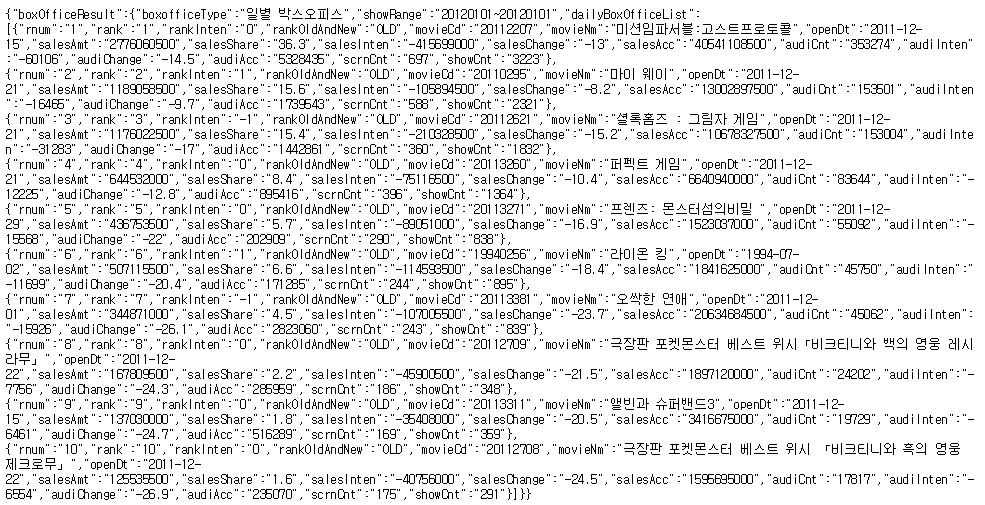
들어가보시면 데이터는 위 사진처럼 구성되어 있네요. 이제 코드를 살펴보죠!
AndroidManifest.xml
<uses-permission android:name = "android.permission.INTERNET"/>우선 AndroidManifest.xml에 인터넷 권한을 부여해주는 코드를 추가해줍니다.
activity_main.xml
<?xml version="1.0" encoding="utf-8"?>
<LinearLayout xmlns:android="http://schemas.android.com/apk/res/android"
    android:layout_width="match_parent"
    android:layout_height="match_parent"
    android:orientation="vertical">

    <Button
        android:id="@+id/button"
        android:layout_width="wrap_content"
        android:layout_height="wrap_content"
        android:text="요청하기" />

    <ScrollView
        android:layout_width="match_parent"
        android:layout_height="match_parent"
        android:background="#FFEB3B">

        <LinearLayout
            android:layout_width="match_parent"
            android:layout_height="wrap_content"
            android:orientation="vertical">

            <TextView
                android:id="@+id/textView"
                android:layout_width="match_parent"
                android:layout_height="wrap_content"
                android:textSize="18sp" />
        </LinearLayout>
    </ScrollView>
</LinearLayout>
Main_Activity.java
package com.example.myvolley;

import android.support.v7.app.AppCompatActivity;
import android.os.Bundle;
import android.view.View;
import android.widget.Button;
import android.widget.TextView;

import com.android.volley.AuthFailureError;
import com.android.volley.Request;
import com.android.volley.RequestQueue;
import com.android.volley.Response;
import com.android.volley.VolleyError;
import com.android.volley.toolbox.StringRequest;
import com.android.volley.toolbox.Volley;
import com.google.gson.Gson;

import java.util.HashMap;
import java.util.Map;

public class MainActivity extends AppCompatActivity {
    TextView textView;
    @Override
    protected void onCreate(Bundle savedInstanceState) {
        super.onCreate(savedInstanceState);
        setContentView(R.layout.activity_main);

        textView = (TextView) findViewById(R.id.textView);

        Button button = (Button) findViewById(R.id.button);
        button.setOnClickListener(new View.OnClickListener(){
            @Override
            public void onClick(View view){
                sendRequest();
            }
        });

        if(AppHelper.requestQueue == null) {
            AppHelper.requestQueue = Volley.newRequestQueue(getApplicationContext());
        }

    }

    public void println(String data){
        textView.append(data + "\n");
    }

    public void sendRequest(){
        String url = "http://www.kobis.or.kr/kobisopenapi/webservice/rest/boxoffice/searchDailyBoxOfficeList.json?key=430156241533f1d058c603178cc3ca0e&targetDt=20120101";
        StringRequest request = new StringRequest(
                //요청방식 지정
                Request.Method.GET,
                //웹서버의 url 정보를 전달
                url,
                //응답을 성공적으로 받았을 때 이 리스너의 onResponse 메소드를 자동으로 호출해주는 리스너 객체
                new Response.Listener<String>() {
                    @Override
                    public void onResponse(String response) {
                        println("응답 -> "+response);

                        processResponse(response);
                    }
                },
                //에러가 발생했을 때 호출될 리스너 객체
                new Response.ErrorListener(){
                    @Override
                    public void onErrorResponse(VolleyError error){
                        println("에러 -> "+error.getMessage());
                    }
                }
            ){ //POST 방식으로 파라미터를 넣음 -> request 객체안에 메소드를 재정의


            @Override
            protected Map<String, String> getParams() throws AuthFailureError {
                Map<String,String> params = new HashMap<String, String>();

                return params;
            }
        };

        //매번 받은 새로운 결과를 출력
        request.setShouldCache(false);
        AppHelper.requestQueue.add(request);
        println("요청 보냄");
        }

        public void processResponse(String response){
        //자바 객체로 변환
            Gson gson = new Gson();
            MovieList movieList = gson.fromJson(response, MovieList.class);

            if(movieList != null){
                int countMovie = movieList.boxOfficeResult.dailyBoxOfficeList.size();
                println("박스오피스 타입: "+movieList.boxOfficeResult.boxofficeType);
                println("응답받은 영화 갯수: "+countMovie);
            }
        }
   }
json 문자열을 받아 자바 객체로 만들어줘야 하므로 MovieList라고 하는 클래스를 하나 만들어줍니다.
MovieList.java
package com.example.myvolley;

public class MovieList {
    MovieListResult boxOfficeResult;
}
boxOfficeResult 안쪽에 있는 데이터를 표현하기 위해 MovieListResult 클래스를 만들어줍니다.
MovieListResult.java
package com.example.myvolley;

import android.graphics.Movie;

import java.util.ArrayList;

public class MovieListResult {
    String boxofficeType;
    String showRange;
    ArrayList<Movie> dailyBoxOfficeList = new ArrayList<Movie>();
}
여기서 변수 이름과 자료형은 JSON 문자열에서 속성의 이름, 자료형과 같습니다.
그리고 dailyBoxOfficeList 안쪽에 있는 데이터를 표현하기 위해 Movie 클래스를 만들어줍니다.
Movie.java
public class Movie {
    String rnum;
    String rank;
    String rankInten;
    String rankOldAndNew;
    String movieCd;
    String movieNm;
    String openDt;
    String salesAmt;
    String salesShare;
    String salesInten;
    String salesChange;
    String salesAcc;
    String audiCnt;
    String audiInten;
    String audiChange;
    String audiAcc;
    String scrnCnt;
    String showCnt;
}
AppHelper.java
package com.example.myvolley;

import com.android.volley.RequestQueue;

public class AppHelper {

    public static RequestQueue requestQueue;

}
Request 객체를 따로 만들기 위한 AppHelper 클래스도 만들어줍니다.
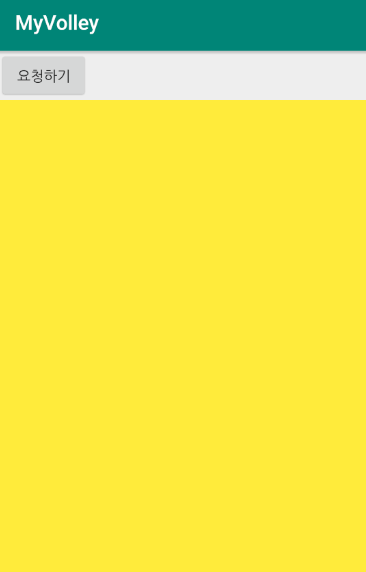
위 코드들에 대한 결과 화면은 아래와 같습니다.
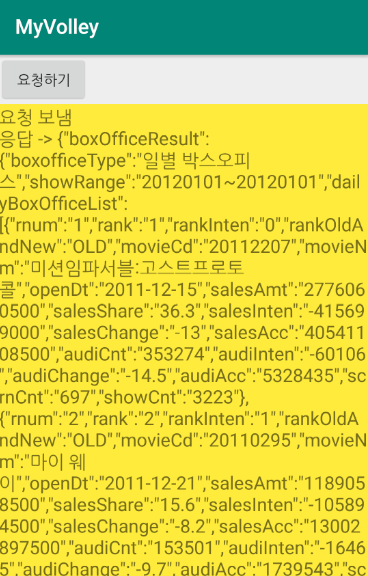
Volley를 이용해 웹서버로부터 JSON 응답을 받고, Gson을 이용해 자바 객체로 바꾸고 그 객체 안에 들어있는 데이터를 출력했습니다.
글 읽어주셔서 감사합니다 :)
'안드로이드' 카테고리의 다른 글
| [Android] 6. 데이터베이스 - 데이터베이스 이해하기 (0) | 2019.08.10 |
|---|---|
| [Android] 5. 네트워킹 - 이미지 다운로드 (0) | 2019.07.29 |
| [Android] 5. 네트워킹 - Volley 사용하기 (0) | 2019.07.29 |
| [Android] 5. 네트워킹 - 웹으로 요청하기 (0) | 2019.07.29 |
| [Android] 5. 네트워킹 - 소켓 사용하기 (0) | 2019.07.28 |


댓글